Jay Fisher - Fine Custom Knives
New to the website? Start Here
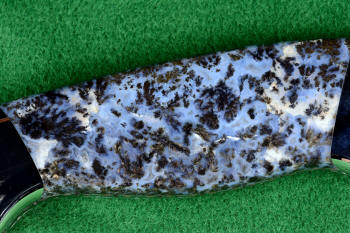
"Zosma" Texas Moss Agate Gemstone Handle
Jay Fisher - Fine Custom Knives |
|||
New to the website? Start Here |
 "Zosma" Texas Moss Agate Gemstone Handle |
||
“Better to have, and not need, than to need, and not have.”
--Franz Kafka
Writer, 1883-1924
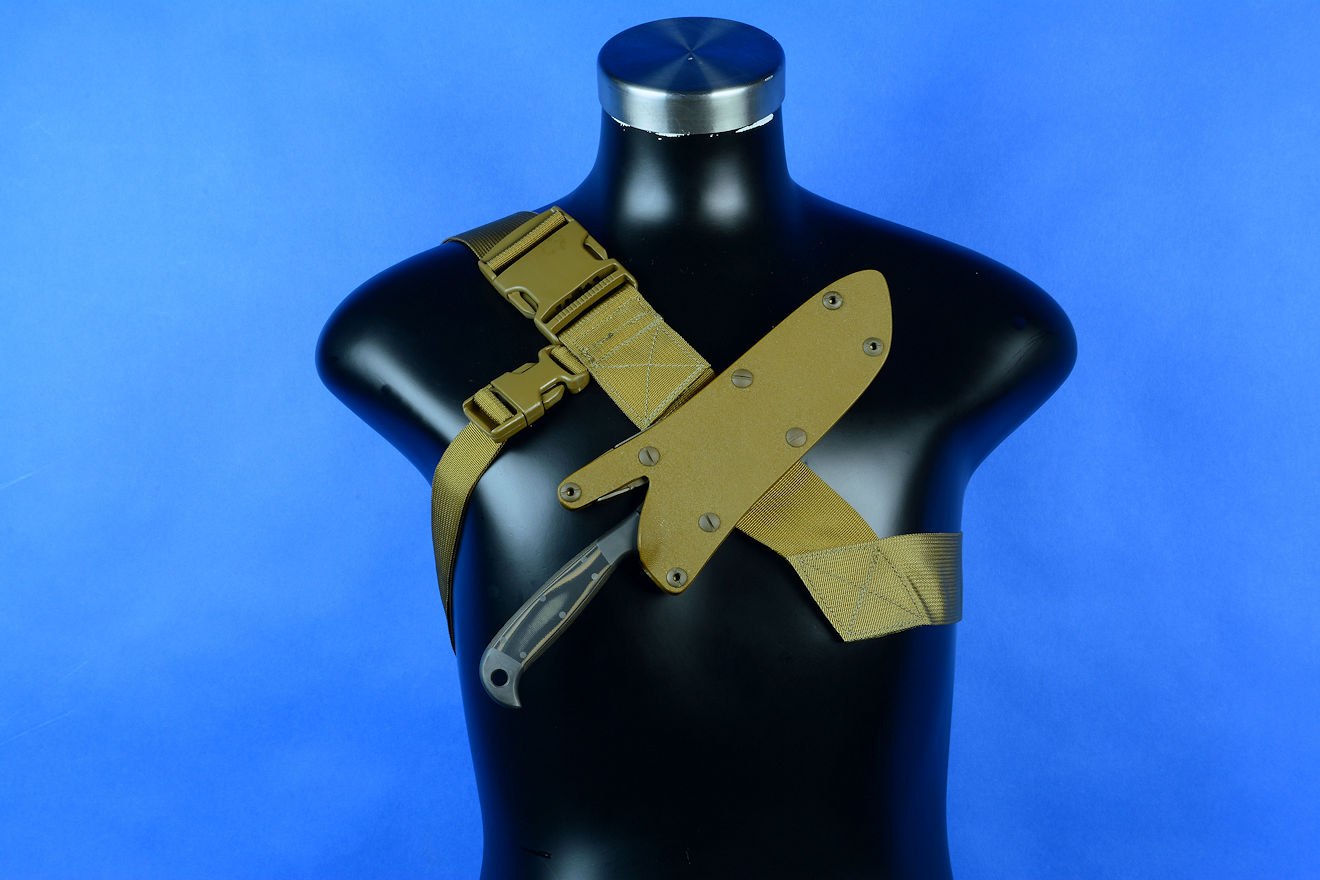
Like all of my accessories, the sternum harness was created because several of my military clients requested a knife rig that could be worn on the outside of their gear, with the knife handle down, at their sternum. Some of the early models were even used in jumps (parachute).
It seems like an easy accessory, but it takes considerable tuning to get it right. The rig must be strong enough to hold the knife securely, yet must have a good safety release factor if a wearer gets hung up in gear, machinery, or his environment (think onboard aircraft, vehicle, or ship).
It also has to be adjustable, to a large amount. This isn't only just because of variable body sizes; it's also because of variations in gear, armor, carriers, and other exterior apparatus worn. Even the weather will change the dimensions of the sternum harness, because of the thickness of the clothing. The sternum harness must be able to be adjusted, fine tuned to the wearer's need, fit, and comfort.
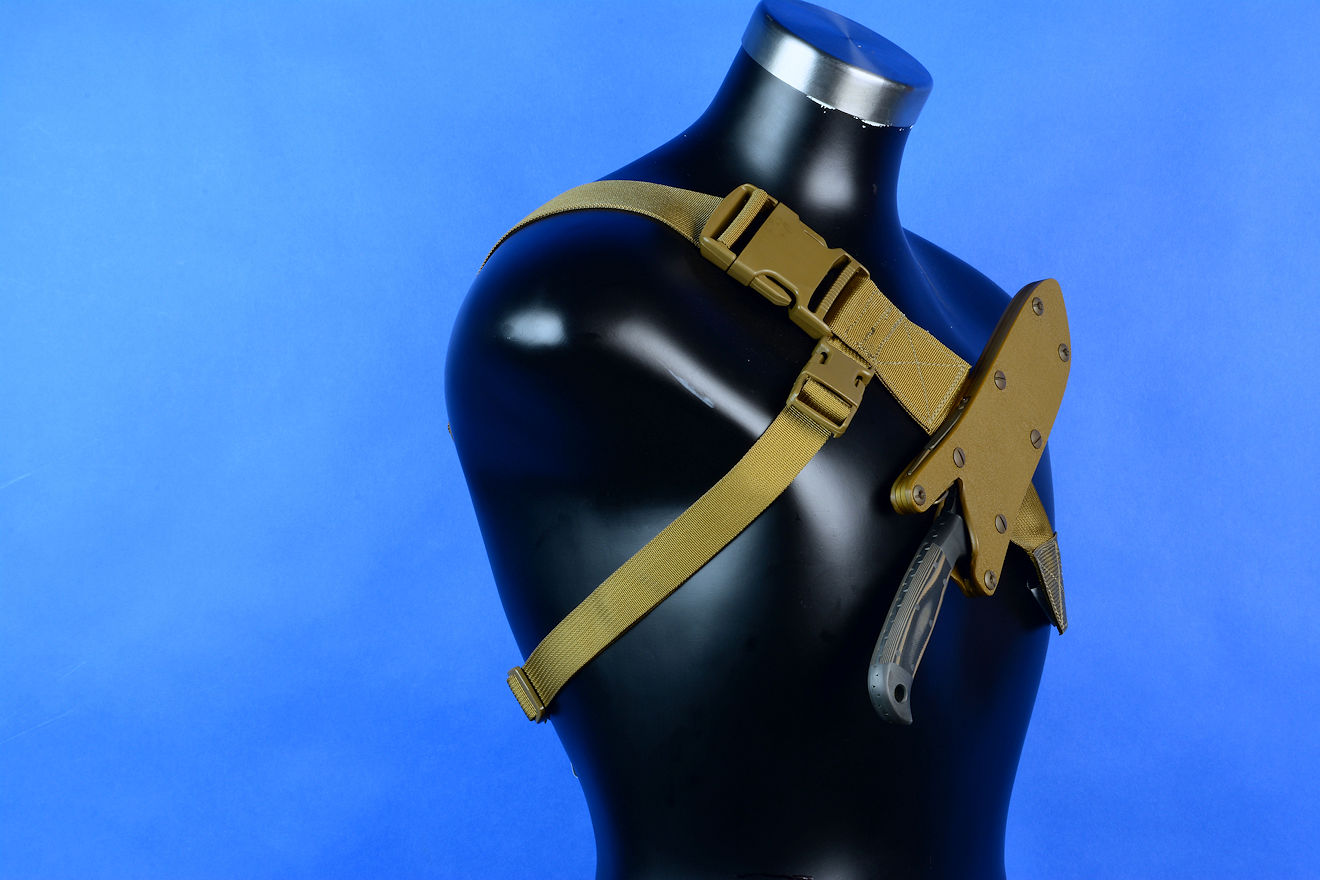
The first sternum harness I designed was a decent one; it worked. However, there was an issue when running and climbing, because it was a simple webbing strap arrangement that relied upon gravity alone, and would only be dependable when the wearer was upright. If the wearer was extremely active (in those days most of these were made for USAF Pararescuemen) the knife could bounce around too much. I simply called these "The Sternum Harness."
It didn't take long to find out that a stronger, more anchored web accessory was needed. I needed to create one that had more anchor points. With more anchors, it was much less likely that the knife would bounce around while running, climbing, or even swimming, so I experimented and came up with a four-point type of harness, using two different web types. This is the only type I make today.
The thicker, heavier web (2" wide) would bear most of the weight of the knife and sheath assembly, and a 1" web would hold the assembly closer to the body.
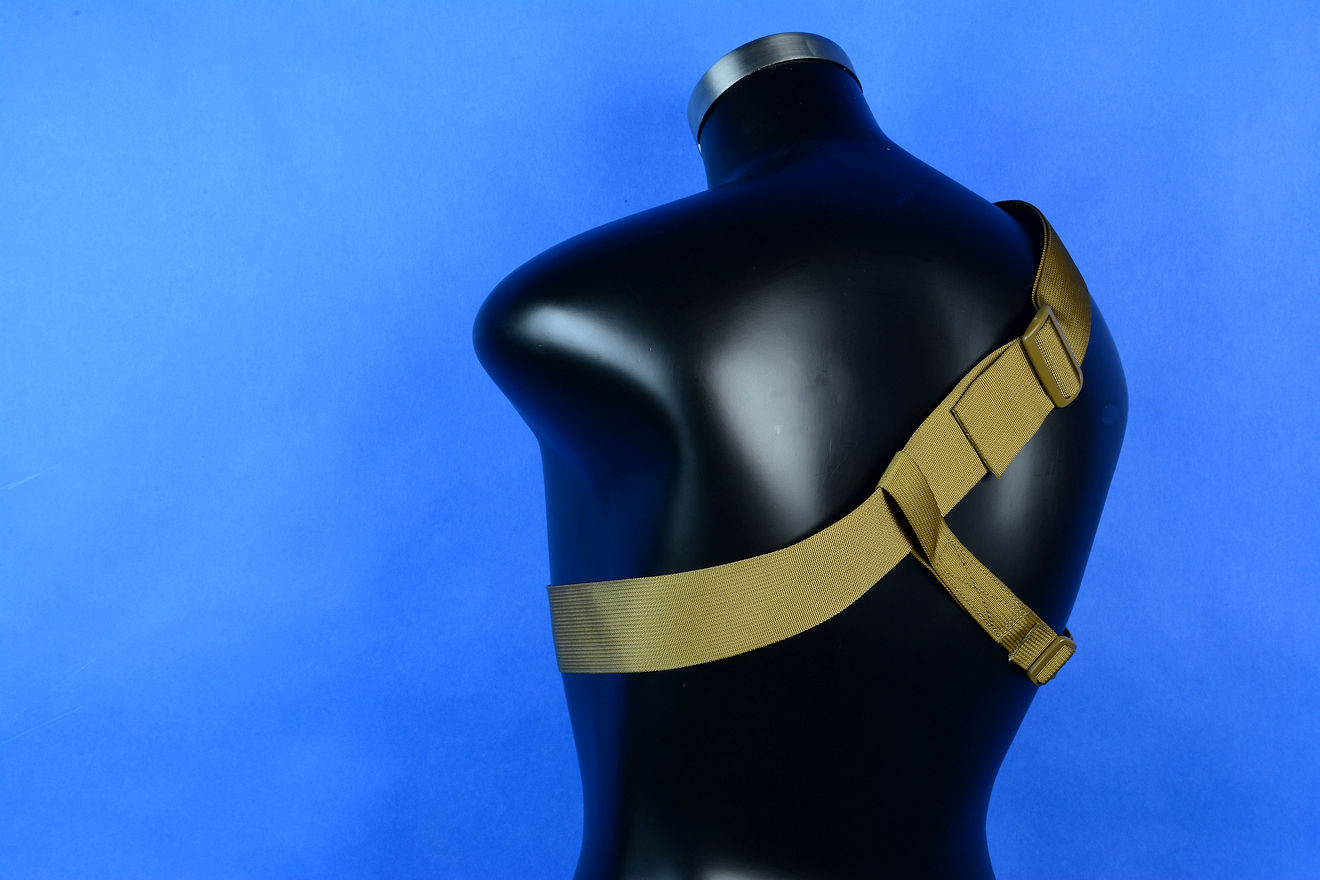
For the right handed user, the design is such that a 2" wide strap goes over the right shoulder, bearing most of the weight of the knife and sheath, and lays over the back. It's path from the back is under the left armpit just at the lower rib cage, and then is angled to lay against the user's front. This forms a ring of webbing. This is not a straight web run; there are some critical angles to understand and incorporate into the piece, so it's constructed of several pieces heavily stitched at angles to each other. The main stitch apex is in the shape of a "diamond," easy to reference in the photos and during mounting of the knife sheath.
To hold the webbing fast and prevent bouncing, my latest versions of the sternum harness plus have a 1" wide web that is permanently attached with a release buckle snap to the 2" web buckle point, very close to the knife sheath mount. The 1" webbing path is under the right arm, around to the user's back, where it has a moving loop of webbing around the 2" strap. This allows a wide range of adjustment of the harness for different users, sizes, and wear to clear and accommodate gear. Also, the loop allows some limited movement since the wearer will be very active in missions and combat, or even if he's hiking through a forest.
The knife sheath is attached just below the 2" release buckle, which is just at the wearer's right collarbone. The knife sheath is clamped to the webbing with the included 304 stainless steel vertical clamping straps or the vertical flat aluminum clamping straps, and the orientation of the knife handle is down. Because these are locking sheaths, the knife won't fall out. The knife handle is at the perfect place, just below the sternum, available to the right hand in an instant.
I use quick-release buckles for both the 1" and 2" webbing components. A simple pinch of just one of these will release the tension or pressure of the harness, and releasing both buckles drops the entire rig off of the user in less than a blink of an eye. The harness won't fall off; the buckles require a pinch depressing two tabs. The harness buckles have a limit of 110 lbs., so they won't support or hang the user hopelessly either, unless he weighs less than 110 pounds. In that case, he shouldn't be wearing this sternum harness, he's too small (I've never actually had this issue)!
The design is so the harness can be instantly dropped if the wearer is trapped. Yet, when snapped and with the adjustment of the web lengths correct, the harness feels snug and smooth, clinging to the body at just the right position.
The release buckles make it easy to don, as well as doff. Usually, just releasing the 1" buckle is all it takes, and the rig, with knife sheath attached, can be lifted over the head and left arm. To don the rig, simply position the knife at the sternum, and put the left arm through the 2" webbing loop. Reach behind the back, grab the 1" web, and snap the buckle in place. Once it's properly adjusted, it takes seconds to do this.
Adjustment is accomplished via the buckle threading and the excess web is held with two tri-glides so extra webbing is not flopping around. Of course, the user can trim the webbing to fit, as long as he seals the ends from fraying with a hot knife or small flame.
The buckles are made of acetyl, and the webbing is either nylon or polypropylene. The webbing is stitched with high strength nylon or polyester thread. Sometimes, I include a couple snap hooks for lighter weight gear in the webbing loops.
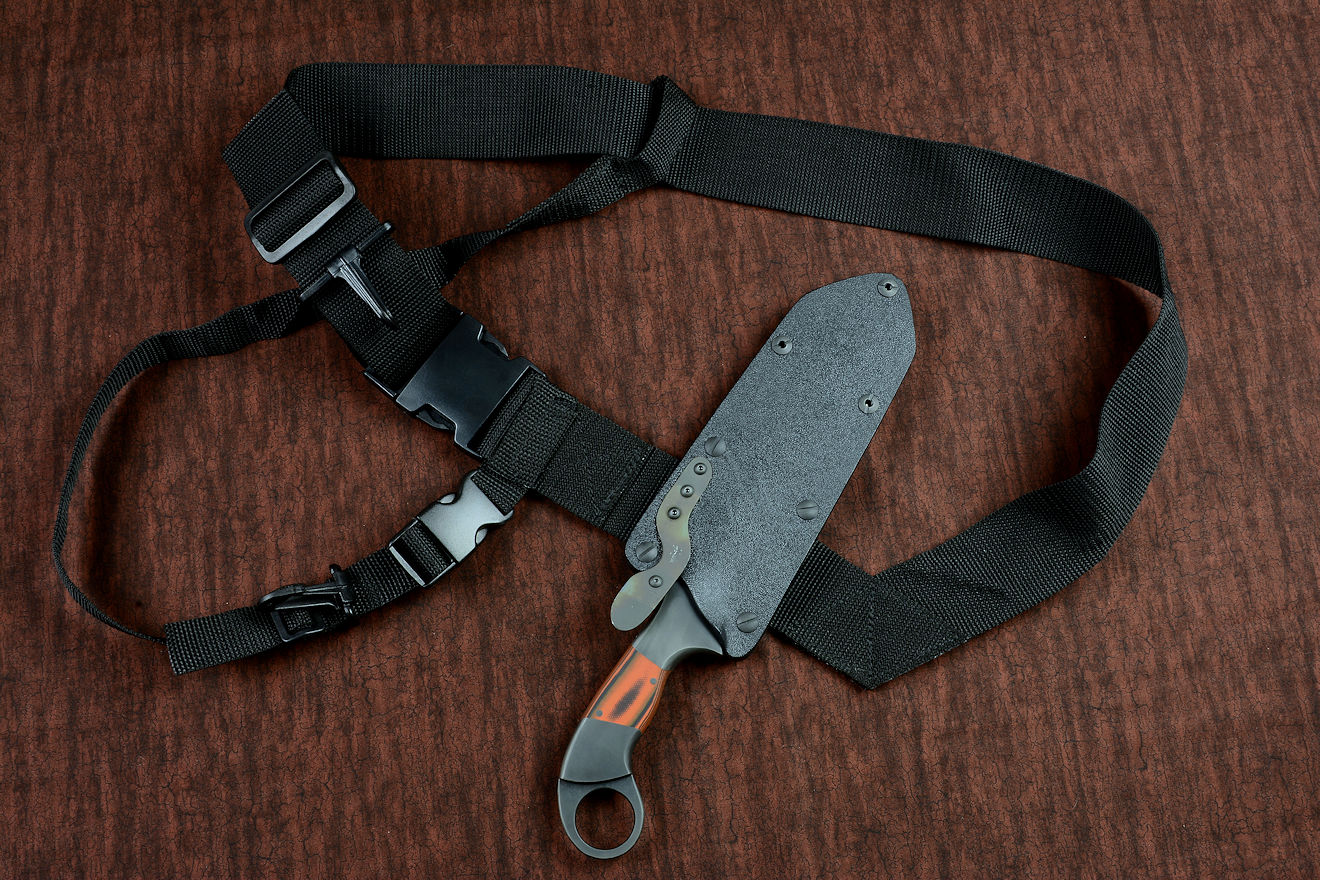
Mounting the knife sheath to the sternum harness plus is a fairly straightforward affair. Just look over the annotated photos below, follow the simple steps, and you're golden.
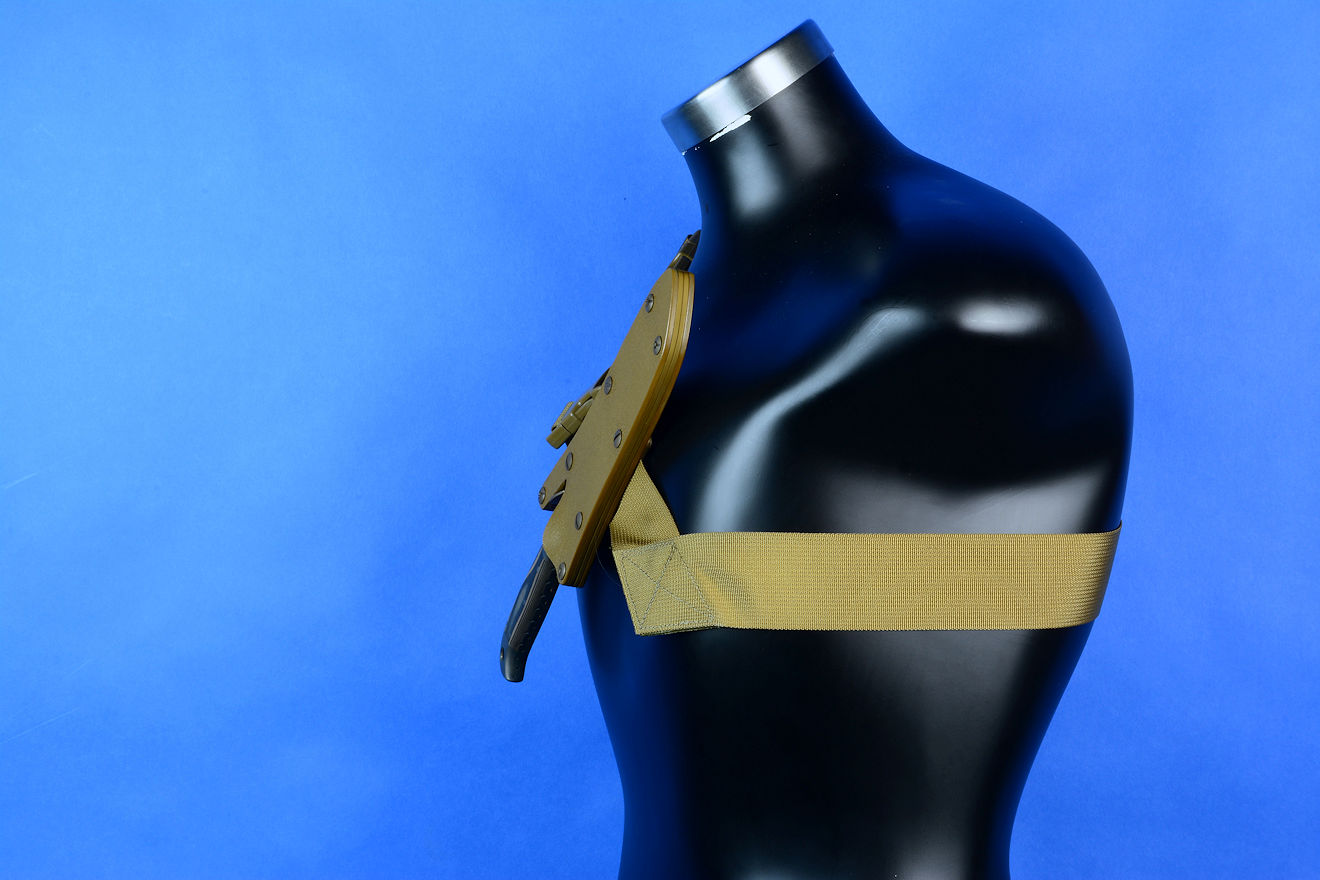
Not a lot to say here. It's waterproof, hose off any heavy soil or hand wash and hang to dry. Make sure the buckles are clear and that they work well. That's about it for maintenance.
For adjustment for individual fit, take up the excess strap adjustment and make sure that the extra webbing is kept in the tri-glides. You can shorten the webbing by cutting and sealing it with a hot knife or flame to prevent unraveling.
If something doesn't feel right, chances are you've got it set up wrong. Look closely at the photos; make sure your setup is good. There is a little play side-to-side in the mounting area (the flat web between the diamond stitch pad and the 2" webbing cross-stitch), so you can adjust it a bit here. The optional hook snaps are easily removed by unthreading the excess web.
Once you get the rig mounted on your person, jump up and down a few times, stretch your arms around, make sure the fit feels good and doesn't sag. Once you're comfortable with the feel of the fit, you can take it off and on repeatedly; it will always fit the same.
If you are a left-handed person, let me know; I'll make a special one for you. You can reverse the one in the kit, but the stitches will be on the "wrong side out." Not a big deal, but I want my clients happy.
Look at the thumbnail photos below; I've even outfitted entire counterterrorism teams with this accessory. It's always an honor.
