Jay Fisher - Fine Custom Knives
New to the website? Start Here
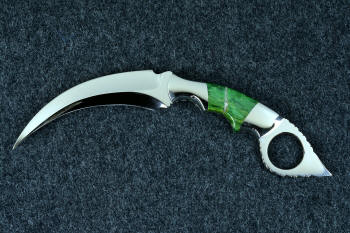
"Raptor"
“Better to have, and not need, than to need, and not have.”
--Franz Kafka
Writer, 1883-1924
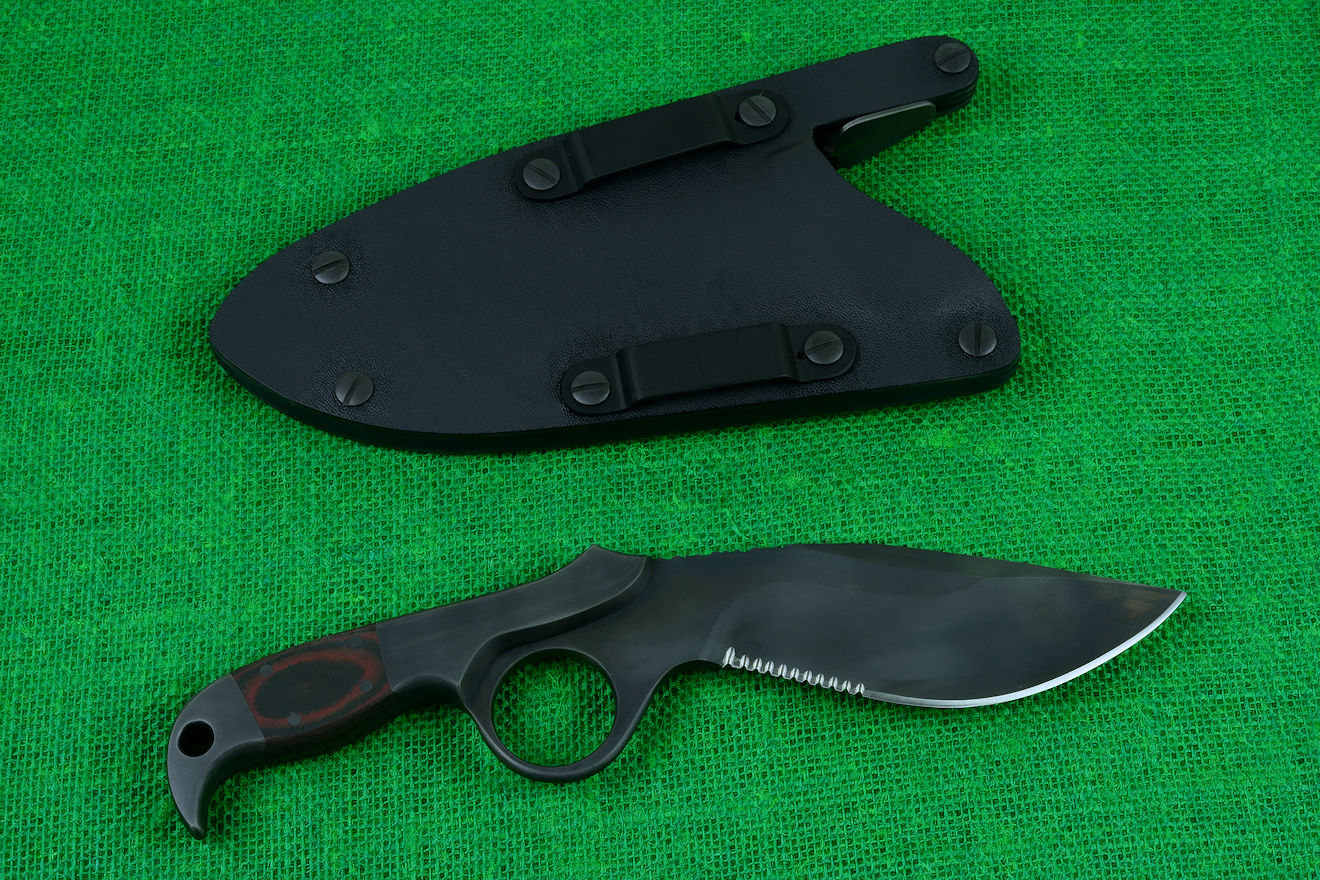
Since the sheath is the most important part of the knife that has to accompany the person, it's not enough that the sheath exists to protect the knife owner and user. It must be worn in a sturdy, dependable, reliable, and convenient fashion. Throughout time, man has devised many ways to wear his knife sheath. As long as there have been clothes, man has adapted the sheath to his clothing so that his knife may accompany him.
Probably the most common wear item for this is the belt. Worn across the chest or around the waist, the narrow, thin strip of leather, textile, or webbing is history's most repeated support of the knife. Belt material and strengths may have changed over millennia, but the shape and size hasn't changed much.
Adding to the typical belt arrangement is the webbing strap. Webbing may occur anywhere in the ensemble, on the body, clothing, pack, gear, rig, or frame. That's why I've included flat clamping straps that can be mounted to MOLLE gear, any webbing, anywhere the knife may fit on a fixed strap.
On this page, you'll see how I've adapted and created various hardware pieces that allow a wide variety of mounting and wearing options, allowing my clients to position their knife sheath, and thus, their knife, just about anywhere there is a belt or strap. I've made and supply hardware that allows movement or sliding along the web or belt, and hardware that allows flat, rigid clamping, fixing the sheath solidly to the belt or web.
These mounting accessories have been used and proven by hundreds of my tactical knife sheath wearers and users, and have been used in combat, rescue, and counterterrorism fields throughout the world.
What you will see here is simply the web, strap, and belt mounts of the very best tactical knife sheath wearing system made in the world today. What you won't see is folded, thin and weak kydex, paracord lashing, hollow eyelets, strings, cords, or lines. You won't see any plastic mounting of any kind; everything you see that I make to mount and wear knife sheaths to webbing or belts is best tactical knife sheath wearing system made in the world today. What you won't see is folded, thin and weak kydex, paracord lashing, hollow eyelets, strings, cords, or lines. You won't see any plastic mounting of any kind; everything you see that I make to mount and wear knife sheaths to webbing or belts is metal. This is why these critical pieces of hardware will never fail my tactical knife sheath owners.
When you leave this page, you'll have a much different understanding of what real tactical gear looks like, and what professionals need but aren't getting in this field.
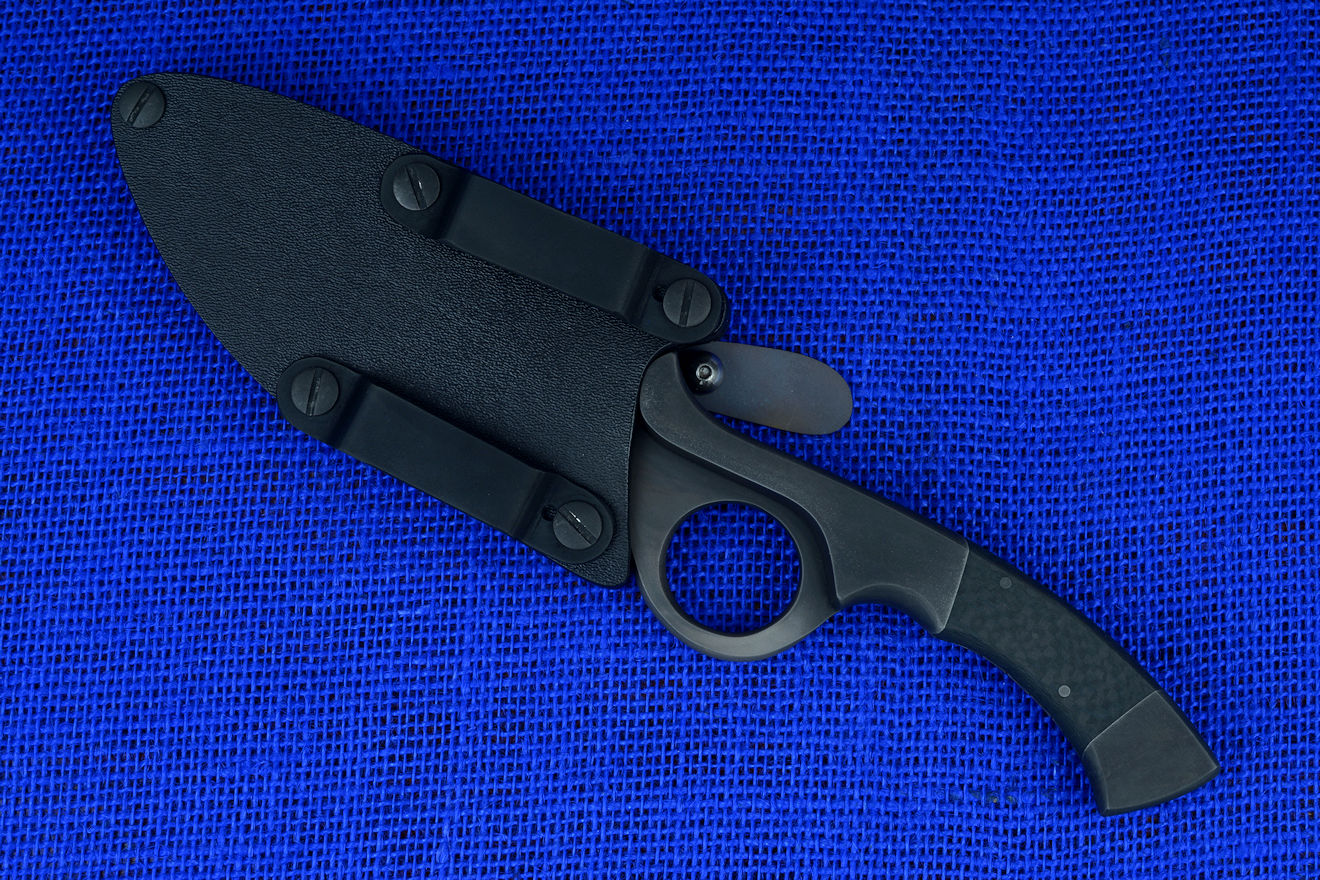
Let's start by defining the belt loop. It's a loop, that is, a ring that surrounds the belt. In early luggage and carrier terminology, this was called a "footman's loop," since the footman would be the servant lugging the heavy steamer trunk for the master. The reason they were called "footmen" is that while the master would be riding in the horse or carriage, the footman would be on foot, running beside him. Ahh, the good old days...
The footman's loop or belt loop on a trunk is a formed material, usually metal, that the belt or strap rides in. The loop keeps the belt or strap in place on the trunk, or in this application, on the knife sheath. In adapting the tactical knife sheath to the belt, the mainstay is the loop. In my tactical knife sheaths, a standard loop system has been used and well-appreciated for decades.
The loops I make and use for my tactical sheaths have some distinctive properties and use features:
The annotated photos below are clear and descriptive.
Horizontal wear is often desired, and along the belt line is a fairly common requested location. In smaller tactical knife sheaths, this can be done in the front of the body on the belt, to the side of the buckle and facilitates an easy crossdraw, which is reaching with the gripping hand across the body to unsheathe the knife.
Horizontal wear is also often desired behind the back, as the belt line is often in the small of the back, or just below it. There are some issues with horizontal wear and I cover those on my sheath page at this bookmark. Please look that over if you're concerned about trying to resheath a razor-sharp, needle-pointed knife next to your kidneys! You should be concerned about this, and nearly all users who wear my sheaths this way do not resheath their knives while wearing their belt and pants. They go someplace private, and carefully sheath their knife with their pants down, and check and adjust the position of the rig. This is actually very good practice!
The horizontal belt loop plates allow the sheath to be worn inline, horizontally, with the belt or web or strapping. Like the belt loops, they allow sliding along the belt, since they do not clamp onto the belt or web. This allows adjustment while mounted to the belt. In order for belt loops to be mounted to the sheath, they are welded to an adapter plate that has bolt holes for the Chicago screws to secure it to the sheath. The holes vary, the placement varies, the width and arrangement varies, so these are custom plates that will only fit the knife sheath they are designed for.
If you notice in the photos below, there may be several pairs of holes through the plates for mounting. This is to allow the plates to be worn on either side of the sheath, making the entire rig reversible. This means you can wear the horizontal belt loop plate-mounted knife on either side or with edge up or edge down. The only limitations are that the plates cannot be mounted on top of the titanium dog-leg spring of my hybrid tension-lock sheaths, as the plate would interfere with the operation of the spring and release. In this case, they are simply located on the opposite side. There are no placement limitations for the positively locking sheath, versions 1.0 and 2.0.
To mount the plates, the main Chicago screws are removed from the sheath, the hole alignment is checked by holding the plate against the sheath. Since they are in pairs, you can hold the plates in various ways until you see the holes line up, while the belt loops that are welded on the plates align with each other. If there is a problem, it's usually because the arrangement was not set up right, the plates are reversed, upside down, or oriented wrong. Just moving them around and carefully observing where the belt will be located in the loops and the hole alignment will clear that up.
In larger sheaths, the belt loop plates may be mounted straddling a belt loop on a pant, for example. This will stop the sheath from sliding too far in either direction, and is a good way for some extra security.
Most of my newer belt loop plates use the largest high profile loops, as these are the easiest to thread the belt through. The annotated photos below are clear and descriptive.
There are situations where the sliding around of belt loops is not desired. Some of my military clients requested a rigid mounting to straps, webbing, belts, gear, or PALS (Pouch Attachment Ladder System) of MOLLE gear (Modular Lightweight Load-carrying Equipment). The versatility of the gear, the personal and individual arrangements on the body or rig needs to work with body armor, mission gear, and even the environment that the knife and sheath are worn in. Also, the huge variety of webbing and straps can cause a lot of headaches.
I developed these simple clamping straps to accommodate this. They are flat straps of 5052H32 corrosion-resistant high strength aluminum alloy, often anodized for durability and color matching and camouflage, just like my standard belt loops.
The big difference is that they are flat so when the mounting screws and fasteners are tightened, they squeeze the webbing or belt and firmly grip it. The straps are mounted either vertically, or horizontally, and are stamped with an "H" or a "V" for identification. On larger knives, they may even be numbered for easier placement. They can be mounted with the male or female components of the Chicago screws through the strap, or the owner can use included button-head cap screws or socket head cap screws, if he needs a longer length. This is necessary on very thick, large webbing (see photos below).
The vertical flat clamping straps mount anywhere on the sheath with the 2.5" bolt hole spacing pattern, the same as the die-formed belt loops. They are completely reversible and on larger sheaths may have many mounting positions on either side. This can allow a "trapped" mounting where the web is threaded outside of the sheath rather than between the sheath and the body of the wearer. The only limitations for the vertical flat clamping straps is that they cannot be placed over the dogleg spring of the hybrid tension-locking sheath. There are no limitations for the positively locking sheath, versions 1.0 and 2.0. The neat thing is that for very wide belts (belts that won't fit through the standard 1.5" or 1.75" wide belt loops), the vertical clamping straps will accommodate up to a 2.25" belt or web width. This is a very wide width, rarely seen or used, but the vertical straps will fit!
The horizontal flat clamping straps are matched to each individual sheath; they are custom and are not interchangeable with any other sheath or location on the sheath. This is because hole spacing and width varies from knife to knife, and sheath to sheath. They can be placed on either side, as long as they don't interfere with the dogleg spring of the hybrid tension-lock sheath. They allow rigid mounting in line with the webbing or strap, or a variety of positions in PALS webbing in MOLLE gear. Each strap only fits on one location on the sheath, but will fit either side so they're reversible. The limitation of the horizontal flat clamping straps is that the belt or web must fit between the screws. On smaller knives, the narrow sheath tip may not accommodate wider webbing, but there will be at least two horizontal flat clamping straps that will work on very wide belts in most knives. You can see this in the photo set below, however, most standard belt widths can be used and clamped to the sheath. To line up the holes, hold the strap over the sheath to see where each horizontal strap fits, since it only fits in one place.
The standard Chicago male screw component thread is 3/8" long, so in some thicker belts is too short to engage the Chicago screws. I've included additional button head cap screws and socket head cap screws that are matching and will allow clamping to belts .250" thick and thicker.
The annotated photos below are clear and descriptive.
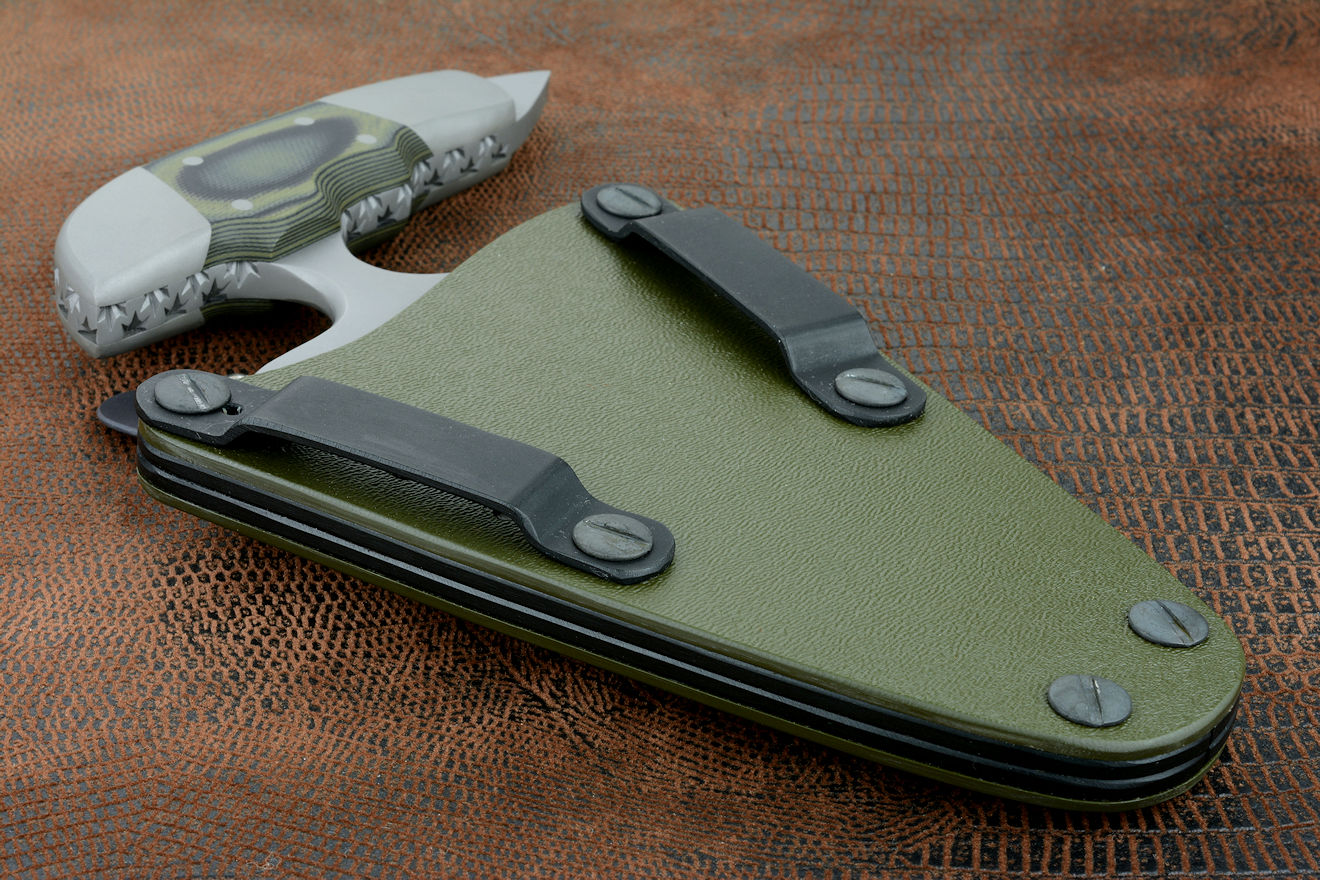
Included with the kits is a special pair of bars. They are milled and dressed 304 stainless steel, typically blackened or oxide straw brown color to match the kits. They are specifically made for the UBLX or LIMA or Sternum Harness mounts, but since they have the same 2.5" bolt hole spacing pattern, they can be substituted as vertical flat clamping straps.
Because they are stainless steel, they are incredibly strong, and can bite down hard enough on webbing and leather to literally scar or press it, distorting it. The aluminum straps won't typically do that, because they have some play and bowing as the screws are tightened.
I didn't intend the stainless bars for clamping on webbing; they are for the LIMA, Sternum Harness, UBLX, and EXBLX accessories. I just wanted it clear that they, also can be used as a high-strength vertical clamping strap.
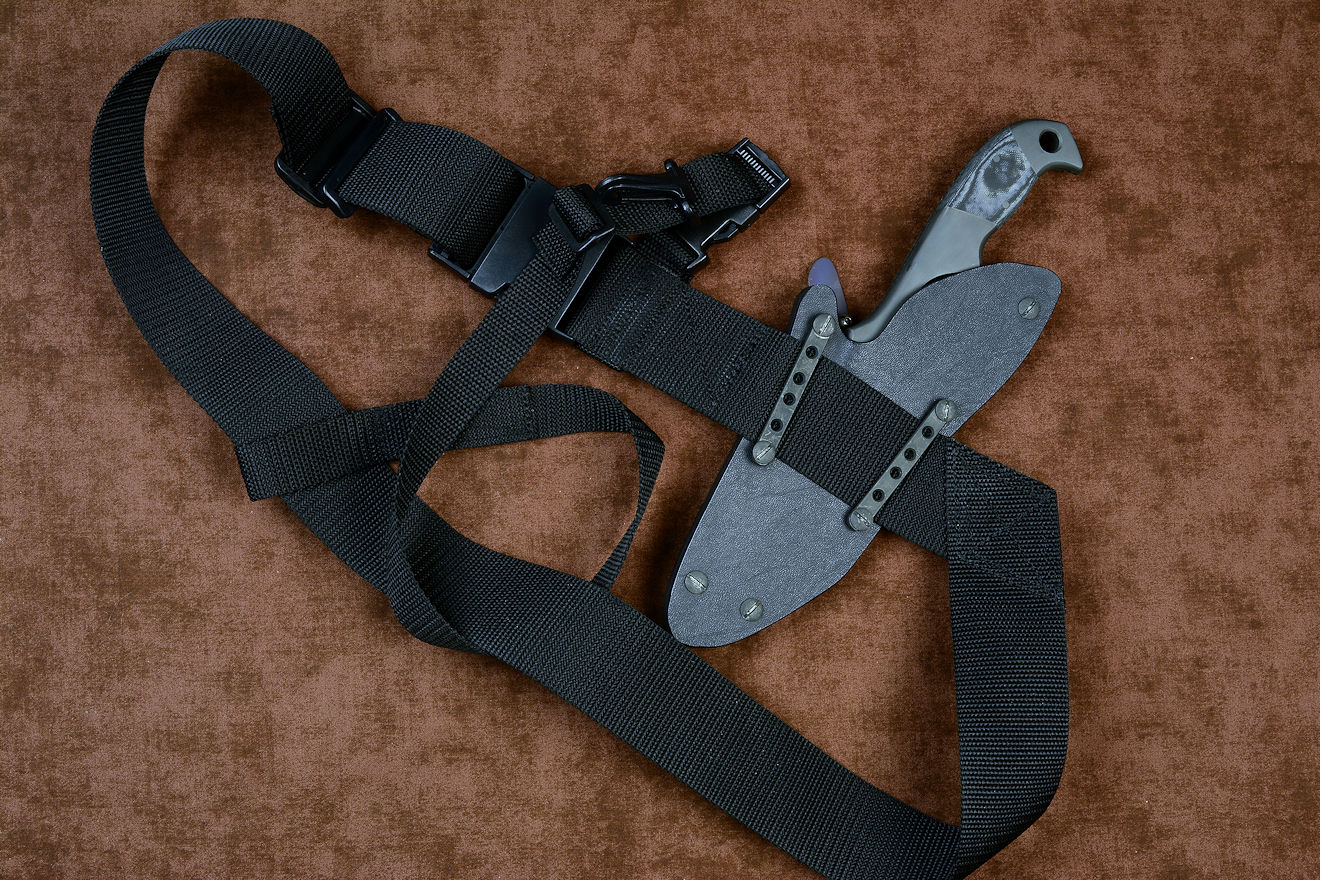
The aluminum flat clamping straps are .190" thick. They are not extremely thick, and can be bent if they are over-tightened. It takes surprisingly little screw pressure to secure these, please don't crank down hard on them like they are the head bolts on an engine. They don't need it; because they are flat finished and anodized, they grip webbing and leather belts and straps very well.
The horizontal belt loops can be over-tightened, also, and when the web is between the welts, against the kydex, the pressure from over-tightening can distort the kydex sheath face or back, and interfere with the play of the knife in the sheath. So, again, just tighten them snug, and don't force the screws.
Like all of the accessories, start the stainless steel machine screws gently and by hand. If they are cross-threaded or difficult to start, take them apart, clean them, and try again. If you force 304 stainless steel into a thread, it will become hopelessly bound and ruined, so be carful when setting up your rig.
There is zero care for the anodized aluminum, or the stainless steel. Rinse off with clean water, and reassemble if soiled. Easy.
| Main | Purchase | Tactical | Specific Types | Technical | More |
| Home Page | Where's My Knife, Jay? | Current Tactical Knives for Sale | The Awe of the Blade | Knife Patterns | My Photography |
| Website Overview | Current Knives for Sale | Tactical, Combat Knife Portal | Museum Pieces | Knife Pattern Alphabetic List | Photographic Services |
| My Mission | Current Tactical Knives for Sale | All Tactical, Combat Knives | Investment, Collector's Knives | Copyright and Knives | Photographic Images |
| The Finest Knives and You | Current Chef's Knives for Sale | Counterterrorism Knives | Daggers | Knife Anatomy | |
| Featured Knives: Page One | Pre-Order Knives in Progress | Professional, Military Commemoratives | Swords | Custom Knives | |
| Featured Knives: Page Two | USAF Pararescue Knives | Folding Knives | Modern Knifemaking Technology | My Writing | |
| Featured Knives: Page Three | My Knife Prices | USAF Pararescue "PJ- Light" | Chef's Knives | Factory vs. Handmade Knives | First Novel |
| Featured Knives: Older/Early | How To Order | 27th Air Force Special Operations | Food Safety, Kitchen, Chef's Knives | Six Distinctions of Fine Knives | Second Novel |
| Email Jay Fisher | Purchase Finished Knives | Khukris: Combat, Survival, Art | Hunting Knives | Knife Styles | Knife Book |
| Contact, Locate Jay Fisher | Order Custom Knives | Serrations | Working Knives | Jay's Internet Stats | |
| FAQs | Knife Sales Policy | Grip Styles, Hand Sizing | Khukris | The 3000th Term | Videos |
| Current, Recent Works, Events | Bank Transfers | Concealed Carry and Knives | Skeletonized Knives | Best Knife Information and Learning About Knives | |
| Client's News and Info | Custom Knife Design Fee | Military Knife Care | Serrations | Cities of the Knife | Links |
| Who Is Jay Fisher? | Delivery Times | The Best Combat Locking Sheath | Knife Sheaths | Knife Maker's Marks | |
| Testimonials, Letters and Emails | My Shipping Method | Knife Stands and Cases | How to Care for Custom Knives | Site Table of Contents | |
| Top 22 Reasons to Buy | Business of Knifemaking | Tactical Knife Sheath Accessories | Handles, Bolsters, Guards | Knife Making Instruction | |
| My Knifemaking History | Professional Knife Consultant | Loops, Plates, Straps | Knife Handles: Gemstone | Larger Monitors and Knife Photos | |
| What I Do And Don't Do | Belt Loop Extenders-UBLX, EXBLX | Gemstone Alphabetic List | New Materials | ||
| CD ROM Archive | Independent Lamp Accessory-LIMA | Knife Handles: Woods | Knife Shop/Studio, Page 1 | ||
| Publications, Publicity | Universal Main Lamp Holder-HULA | Knife Handles: Horn, Bone, Ivory | Knife Shop/Studio, Page 2 | ||
| My Curriculum Vitae | Sternum Harness | Knife Handles: Manmade Materials | |||
| Funny Letters and Emails, Pg. 1 | Blades and Steels | Sharpeners, Lanyards | Knife Embellishment | ||
| Funny Letters and Emails, Pg. 2 | Blades | Bags, Cases, Duffles, Gear | |||
| Funny Letters and Emails, Pg. 3 | Knife Blade Testing | Modular Sheath Systems | |||
| Funny Letters and Emails, Pg. 4 | 440C: A Love/Hate Affair | PSD Principle Security Detail Sheaths | |||
| Funny Letters and Emails, Pg. 5 | ATS-34: Chrome/Moly Tough | ||||
| Funny Letters and Emails, Pg. 6 | D2: Wear Resistance King | ||||
| Funny Letters and Emails, Pg. 7 | O1: Oil Hardened Blued Beauty | ||||
| The Curious Case of the "Sandia" |
Elasticity, Stiffness, Stress, and Strain in Knife Blades |
||||
| The Sword, the Veil, the Legend |
Heat Treating and Cryogenic Processing of Knife Blade Steels |